Adding Automated Speech Recognition in Zoom is simple!
Laurie Zuckerman, the North America Webinar Coordinator for ESRAG, D 5400 has shared this easy how-to guide!
The accuracy of Zoom’s live transcription feature depends on many variables, such as but not limited to:
- Background noise
- Volume and clarity of the speaker’s voice
- Speaker’s proficiency with the English language
- Lexicons and dialects specific to a geography or community
In a meeting or webinar, here’s how to set it up:
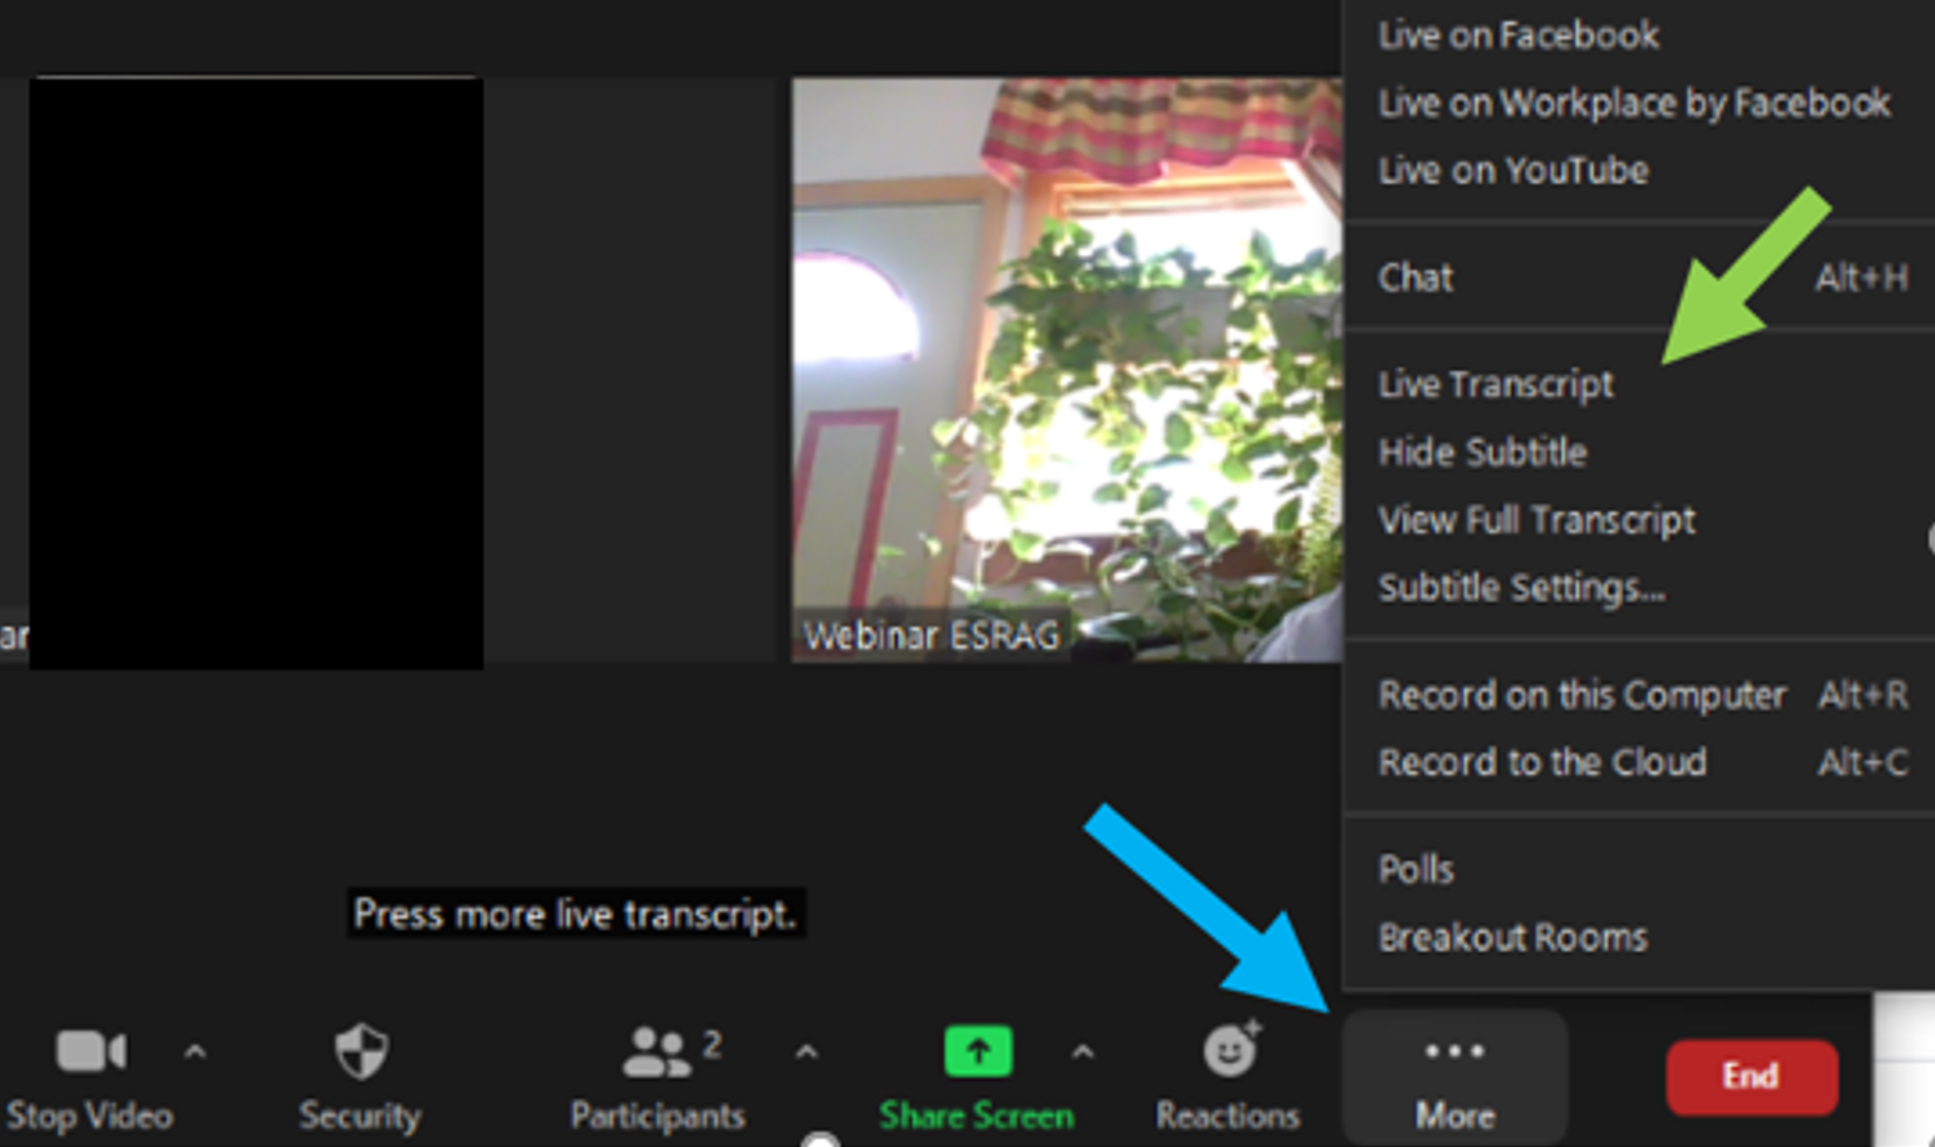
Before your meeting begins, press “More …” then “Live Transcript”
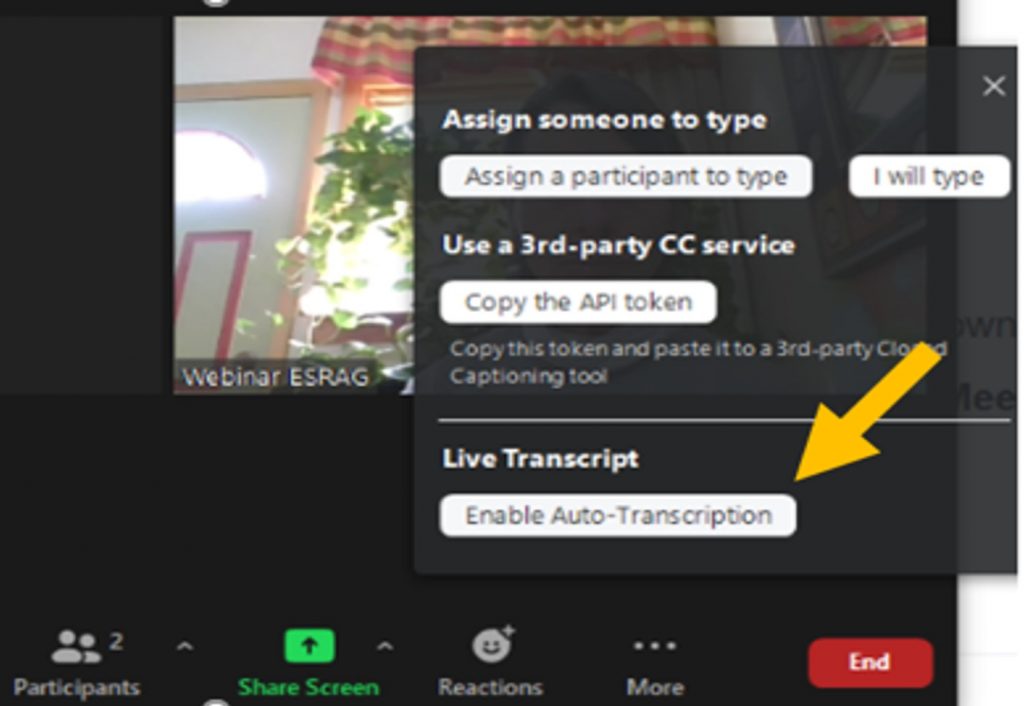
Press “Live Transcript, Enable Auto-Transcription”
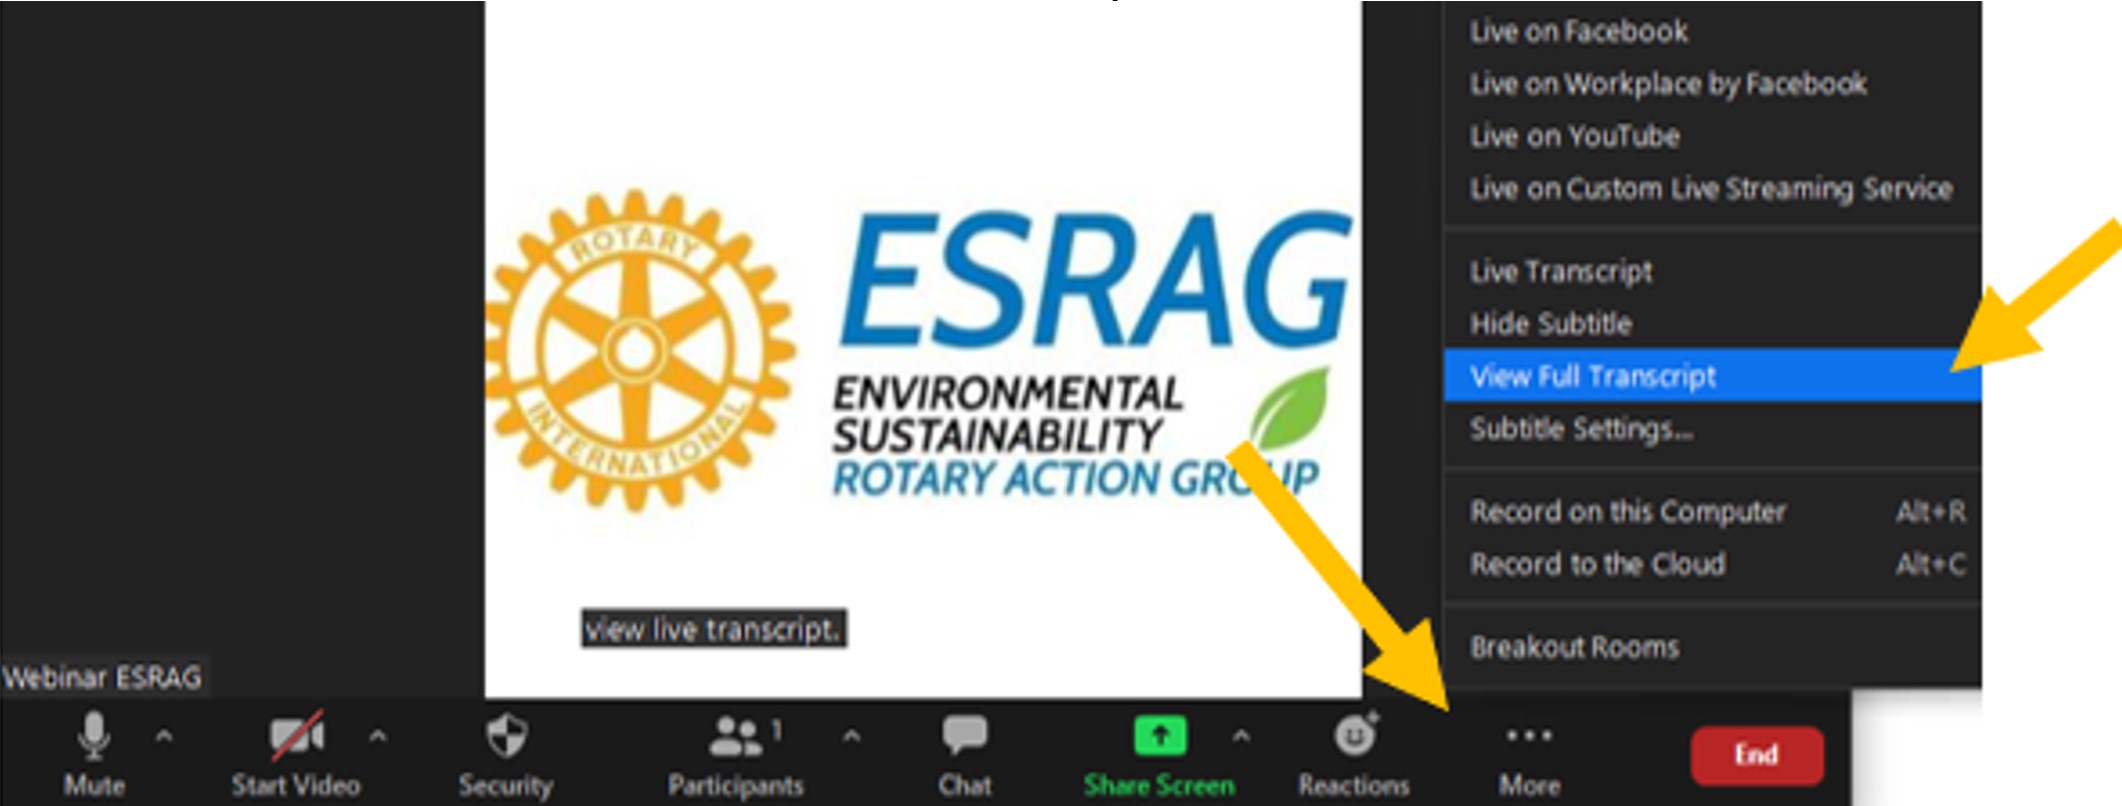
Press “More…” then choose “View Full Transcript”.
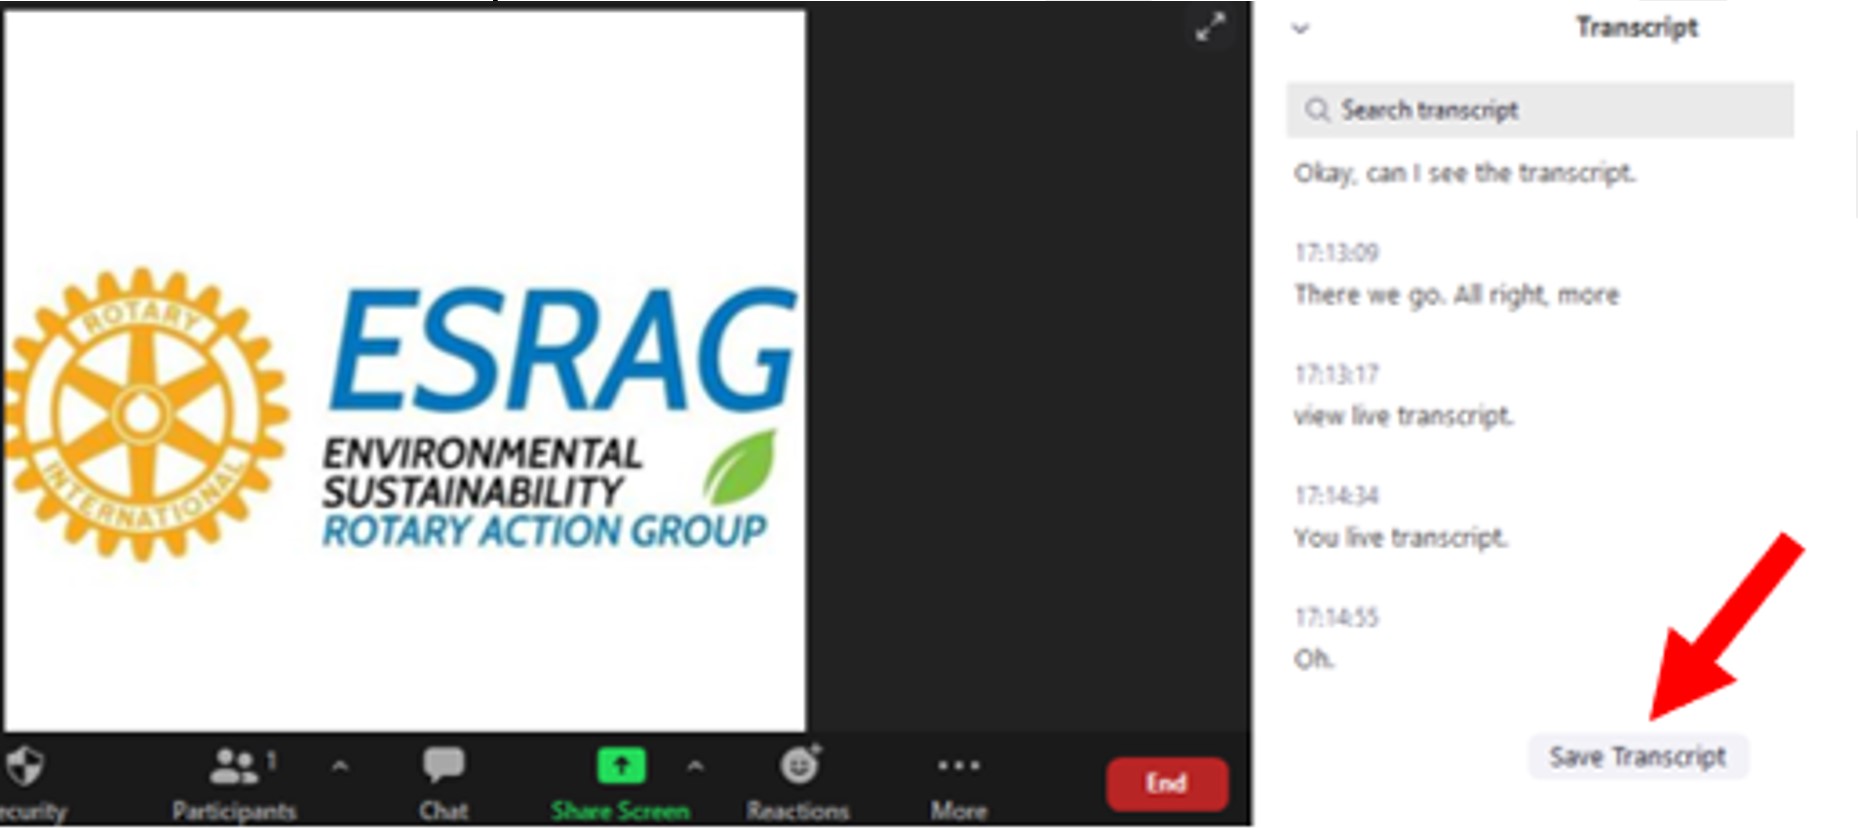
Press “Save Transcript”.
During the meeting and webinar, the transcript will be below the presenters and can also be viewed on the side. Note: you cannot see both the transcript on the right side and the chat on the right side at the same time.
The recording of our webinar will show closed captions at the bottom of the video.

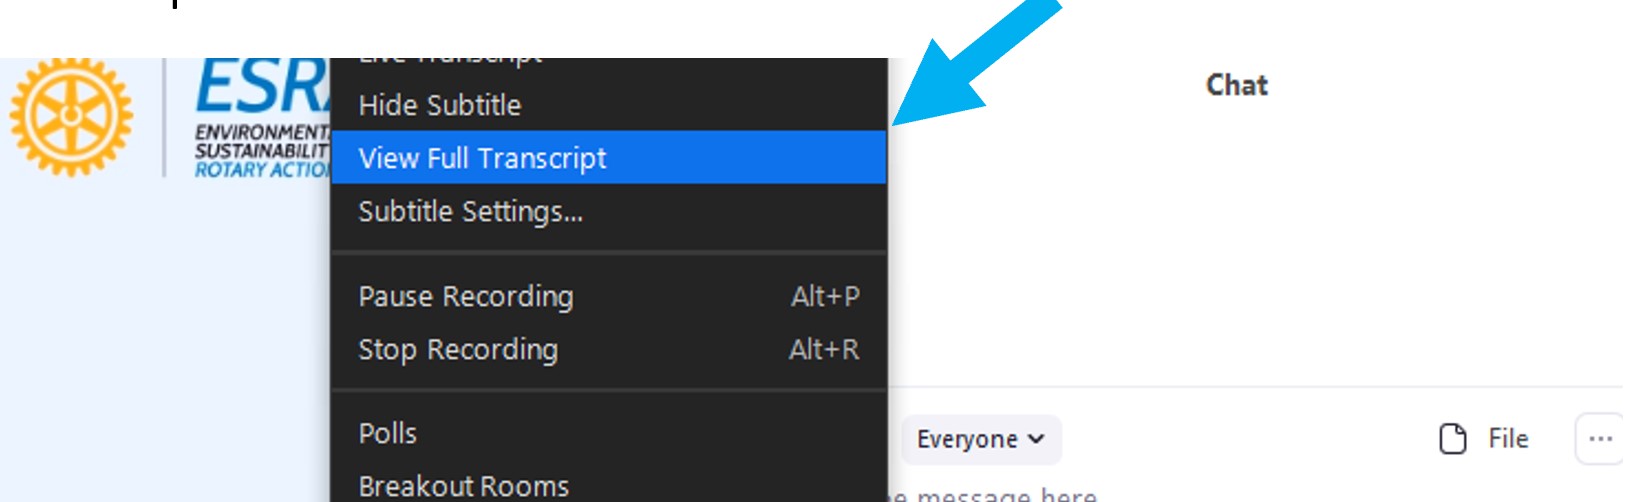
To find the copy of the complete transcript, press “…. More” then “View Full Transcript”
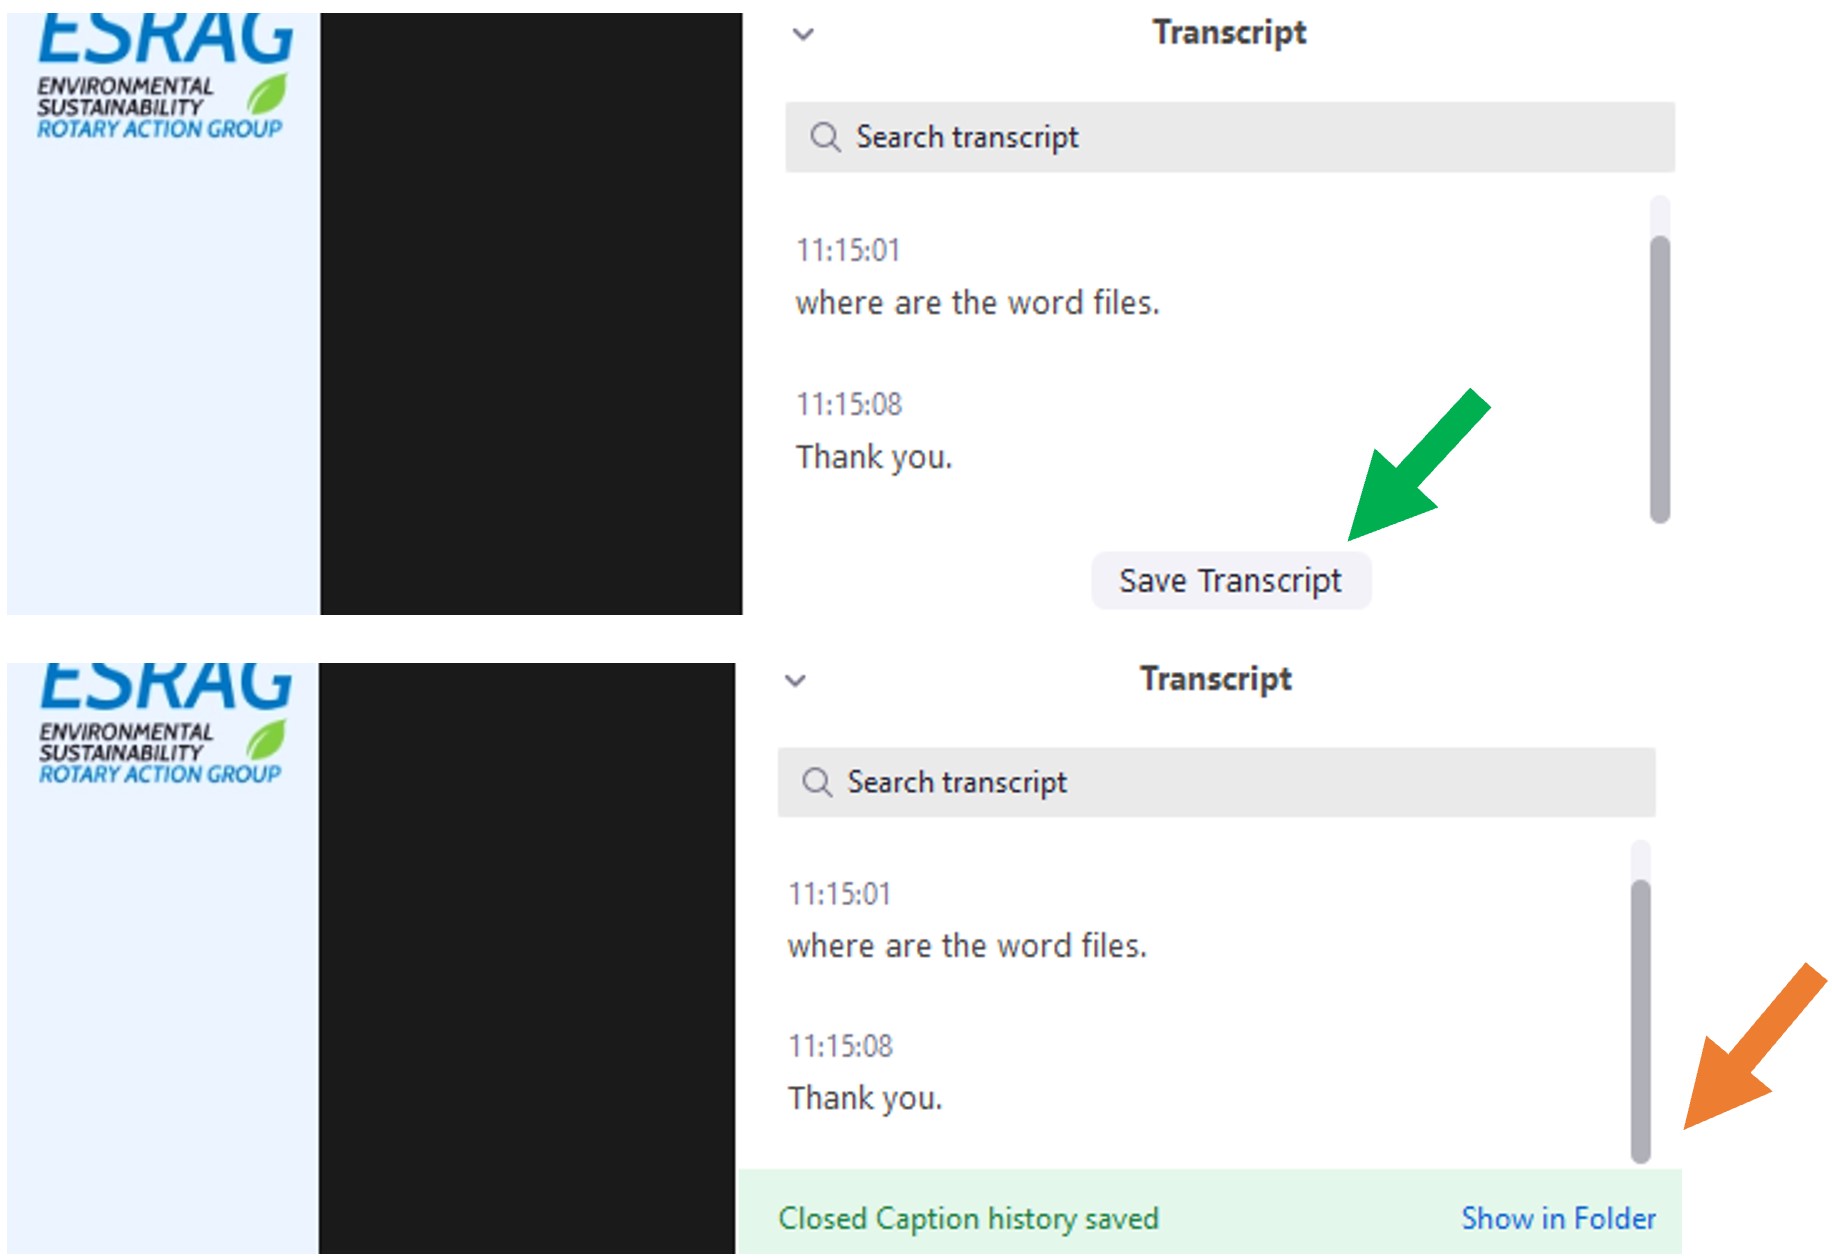
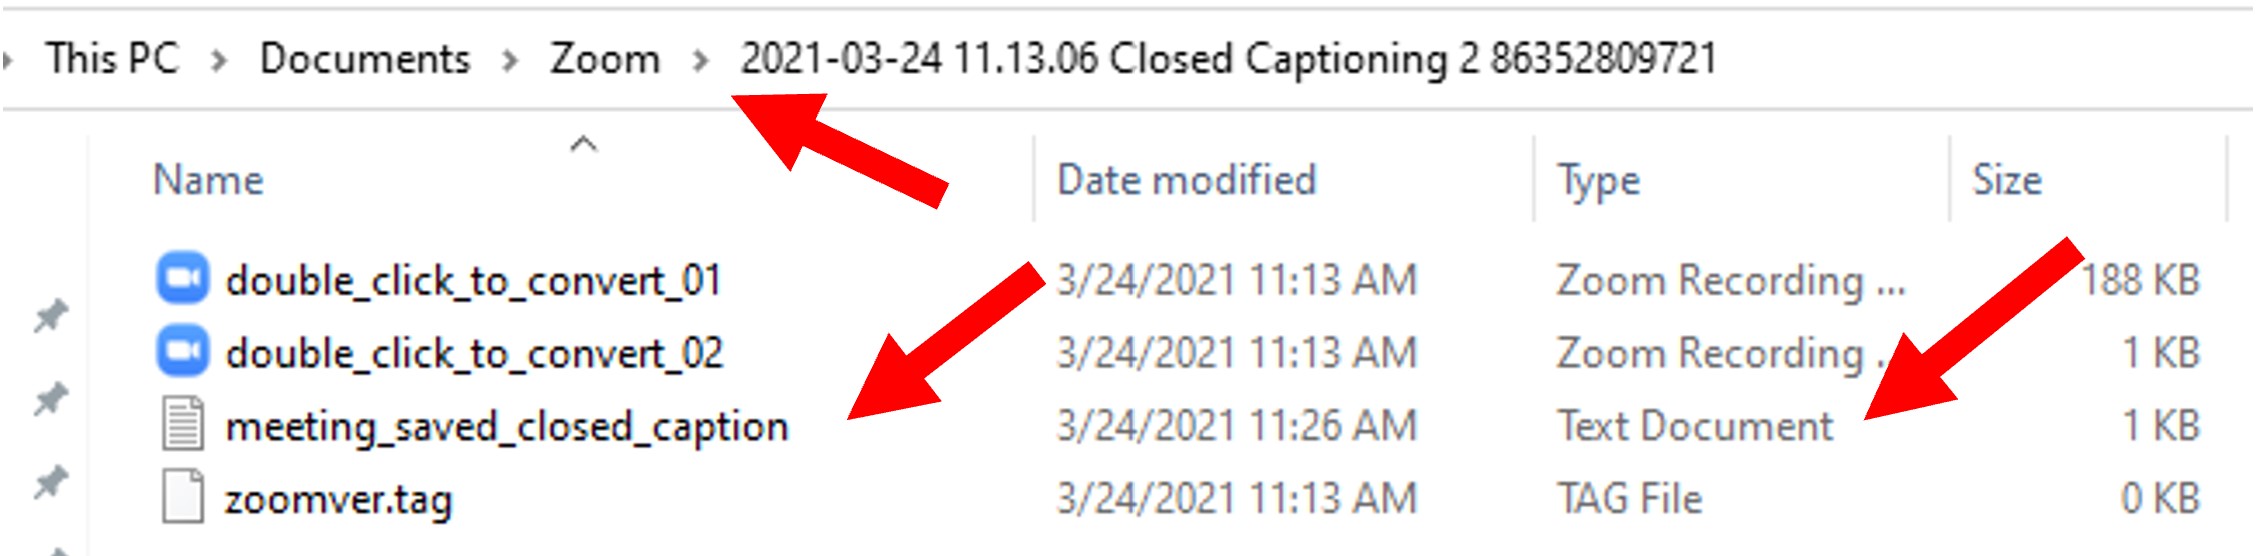
Chat will go away, and you’ll see the Transcript to the right of your Zoom panel. Press “Save Transcript” then “Show in Folder.”
If you are recording to the local PC, it will link to the closed caption file.
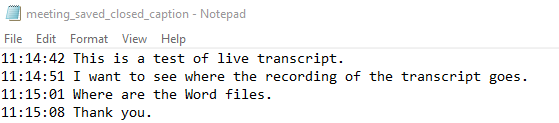
Open the Text File. It should look something like this. You can copy and save it to other formats.
If you are recording to the cloud, and go through the steps listed above, you can still find a recording of the transcript on your local computer in a file called Zoom.
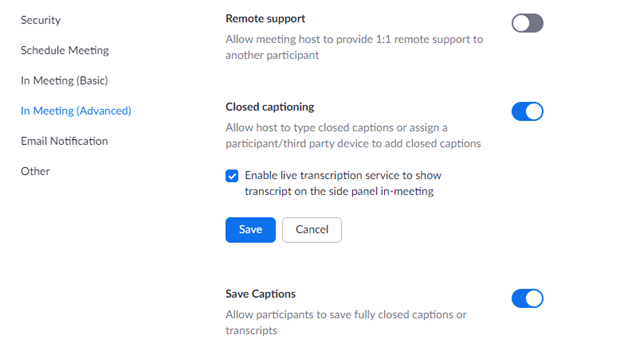
Having difficulties on your personal Pro Zoom account?
Make sure you have enabled closed captioning. Go to
- Settings
- Click Meeting (Advanced) tab
- Scroll halfway down the page to Closed Captioning and enable.